Wednesday 28 December 2016

How and Why to Change Your Manual Transmission Fluid

Your car's manual transmission fluid is more important than you think. Though it doesn't have to be changed as often as motor oil, fresh gearbox fluid keeps your stick-shift transmission from overheating and tearing itself apart. That's why Jason Fenske from Engineering Explained is here to show you how to change your car's transmission fluid right in your garage.

Since manual transmissions do their jobs through a lot of metal-to-metal contact, they need lubricant to soften touch points and keep everything running smoothly. Over time, that fluid gets dirty and worn out, and needs to be changed.

The first step is getting your car in the air and sitting level. This lets you access the transmission and insures you'll fill it to the correct level.

Next, find the fill plug on the upper portion of the transmission housing and unscrew it. Then, find the drain plug, and undo that to drain the gearbox. Make sure to have a catch pan ready.

After everything's drained, reinstall the drain plug with a new washer, and refill the transmission, using a transfer pump to get the fluid up into the filler hole.

Replace the fill plug with a new washer, clean up any excess fluid, and boom, you're done. Pretty easy right?

Fenske put together a thourough video walking us through how to change the transmission fluid on his personal Honda S2000. It goes into great detail, so if you're getting ready to swap out your own car's fluid, it's a must-watch.


edited by DNT Tools

How to Clamp off Fluid Hoses During Maintenance and Repair

Wednesday 21 December 2016

How to repalce inner track rod joint by tie rod tools

How to Change a Car Battery?DNT Tools

Changing your car battery is a simple and easy automotive repair that you can actually accomplish yourself with the right preparation and a little physical strength.
While most people realize that they need a battery when their car refuses to start, it is very important to be aware of the state of your battery before this happens so you can replace it before you are stranded on the side of the road. Here are instructions that explain how to check for a bad battery. To change your car battery follow these instructions:

How to change a car battery

  1. Gather the correct materials - Before you get started, you will need the following materials: Gloves, Ratchet with extension (¼ inch), Safety glasses, Sockets (8mm, 10mm, and 13mm), and Water (almost boiling).
  2. Make sure the car is in a safe place - Make sure you have your car parked on a flat surface, away from traffic, away from smoking or any other situation that may cause an electrical current to spark and cause a fire. Then, be sure to take off any metal accessories such as rings or earrings.
  3. Put the parking brake on and turn off the car - This is one of the most important steps. Be sure that the car is completely off.
    reading codes from radio
  4. Check to if radio and navigation codes apply - Prior to removing or disconnecting your battery, see if your car requires any radio or navigation codes to be imputed once the new battery is installed. These codes can be found in your owner’s manual, or obtained from your car’s dealership.
    If your vehicle does need these codes, and you don’t have a memory saver to install in the cigarette lighter, then write down the codes. This will ensure your radio and navigation work as they did before the battery was removed.
    car battery visible
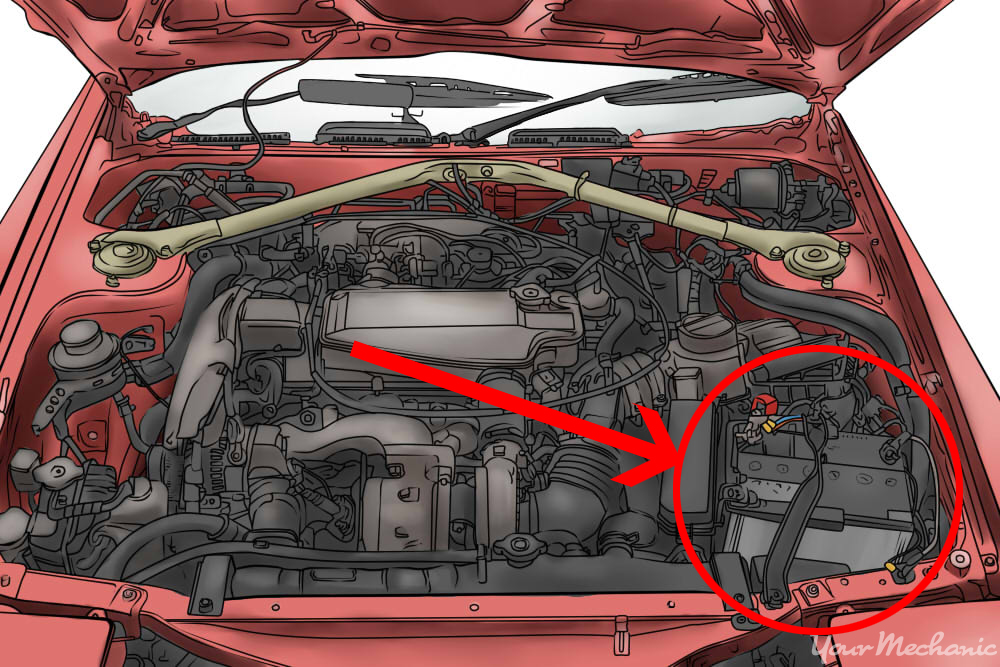
  5. Locate the battery - Open the hood and secure with hood prop or struts. The battery should be should be in plain sight and there may be a cover to remove, depending on vehicle.
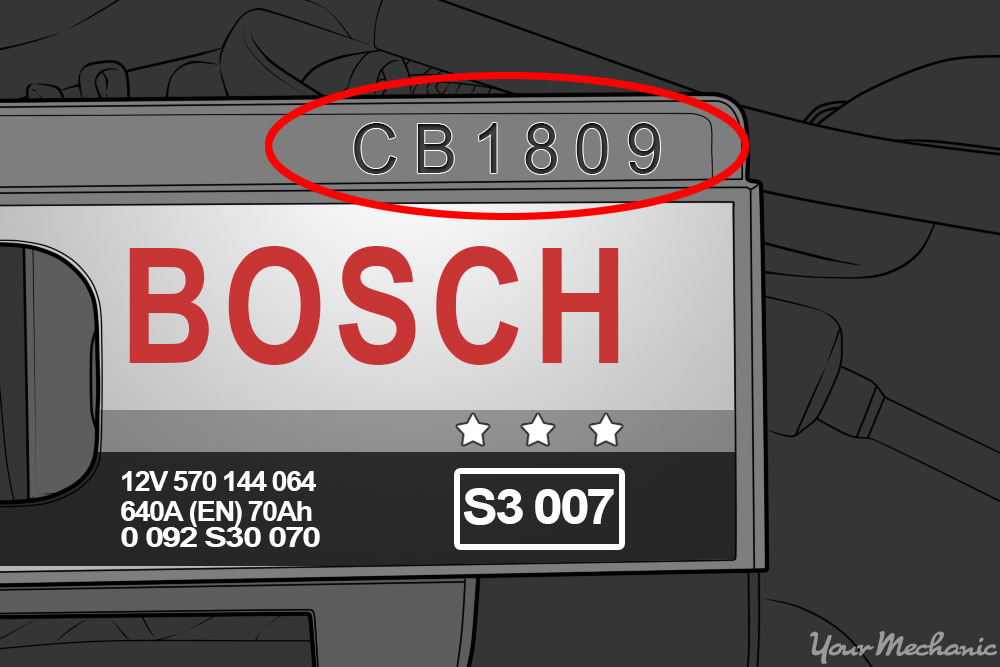
  6. Check the age of your battery - Checking the age of the battery can give you an idea if it is time to replace it. Most batteries need to be changed out every 3-5 years. Therefore if your battery age falls in that age bracket it may be time for a new battery.
    date showing on car battery
    Tip: If you do not know the age of your battery, many batteries actually come with date codes to identify the year and month the battery was shipped, giving you a great estimate of the age and condition.
  7. Check the car headlights - Consistently having to jumpstart your car is another sign you may need a new battery. Another symptom is dim vehicle lights. To test this, try turning the key to the on position and looking over your dashboard.
    corroded battery terminal
  8. Check the battery for corrosion - Visually inspecting the battery can give you an idea of the state it is in. You can look for corrosion on battery terminals or sulfate build up, a white powder, which would be indicative of a bad connection. Occasionally cleaning the battery terminals can solve the problem of low connection.
    Warning: Please always do so with gloves on to protect your hands from the sulfate powder.
  9. Check the battery with voltmeter - Some people have access to a device known as a volt meter. If you want to use this to test your battery, make sure the car and lights are off and put the positive meter on the positive terminal and the negative meter on the negative battery terminal.
    Check for a reading of 12.5 volts. If it reads below 11.8, it is a discharged battery.
    removing battery terminal
  10. Wear protection from sulfate - Make sure you have put on your safety glasses and gloves, this will help keep you away from the sulfate buildup, if there is any. Using the correct size socket with extension and ratchet, remove the bracket that secures the battery to the vehicle, known as a Battery Hold Down.
    You can then use a correct size socket and ratchet to first loosen the negative battery terminal. Use your gloved hand to twist off and remove the terminal after it is loosened as you pull off battery post, set aside, then do the same for positive.
    Tip: If necessary, before removing the battery cables, label each side so you do not mix up positive and negative. Mixing these up can cause a short circuit and possibly damage the entire electrical system.
    person showing proper lifting technique
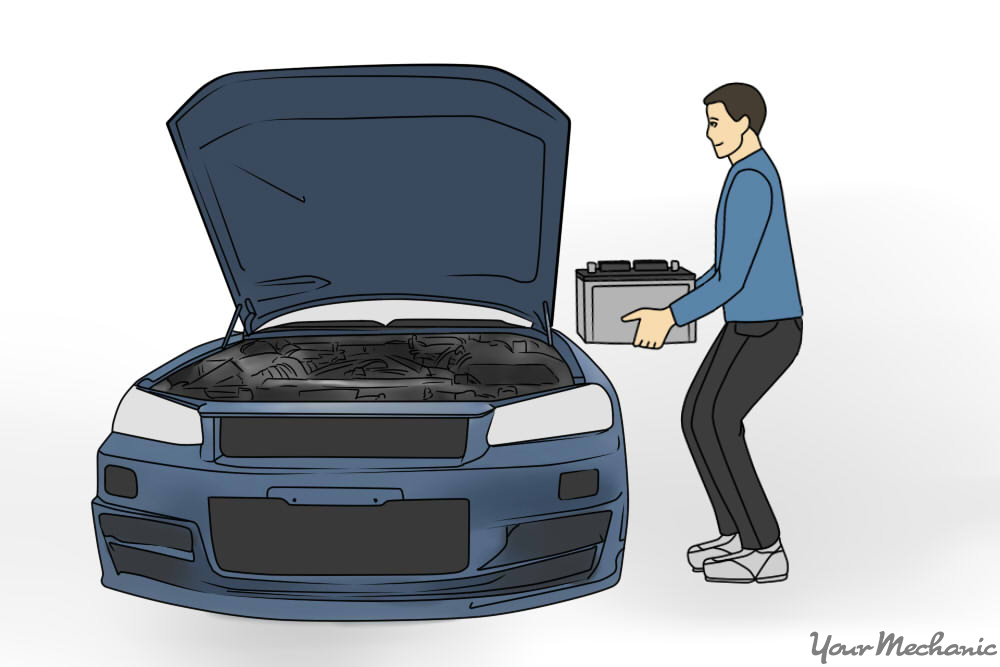
  11. Securely remove the battery from the car - Removing the battery is a physical activity and is the most difficult part of the change. Carefully and securely lift and remove the battery from car. Be sure to use proper posture, as even though the battery is small, it is heavy and usually weighs around 40 pounds.
    Tip: Now that your battery is removed, you can take it to your local auto store for proper testing. You can dispose the old battery and obtain a new battery that is the correct one for your car.
    person pouring hot water onto terminal
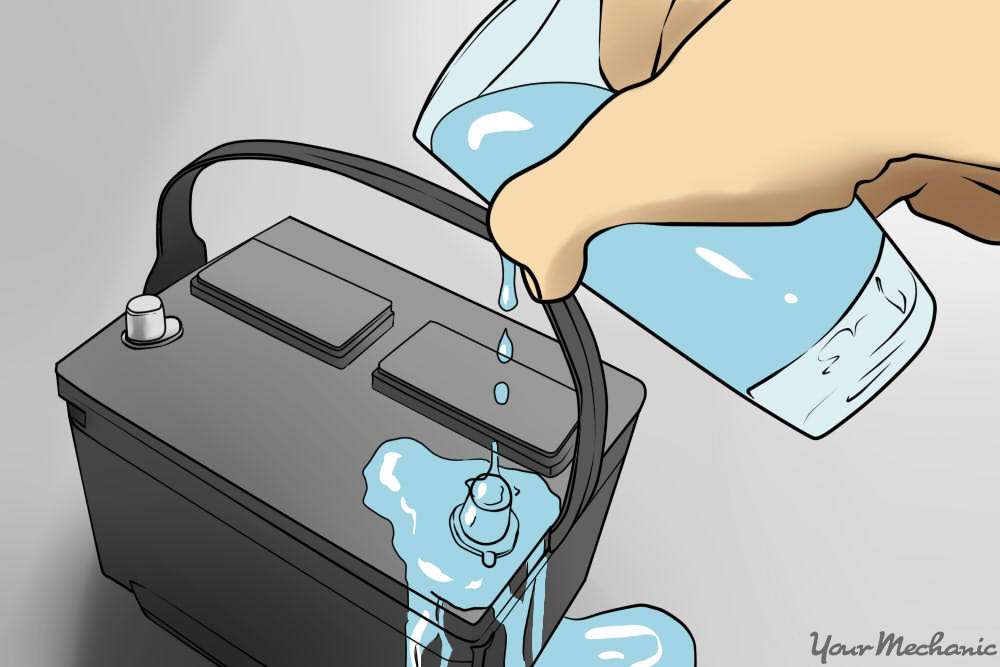
  12. Clean the battery terminals - With the battery out, it is then important to clean off the battery terminals. To do so, use almost boiling water in a cup and pour it directly onto each terminal. This removes any corrosion and any sulfate powder that may not have been removed earlier.
    battery with positive terminal clearly labeled
  13. Install the new battery - Now it is time to install your new battery. Using proper posture, carefully place the battery into the holder. Using the correct sized socket and ratchet, re-install the Battery Hold Down to ensure the battery is secured to vehicle.
  14. Secure positive - Take the positive terminal and place it on the battery post, making sure it is secured all the way toward the bottom of the post. This will help avoid future corrosion.
  15. Secure negative - Once you have snugged down the battery terminal onto post with ratchet, you can repeat with the negative terminal.
    Tip: Again replace these in order to avoid electrical problems. Replace any battery covers if applicable and close the hood.
  16. Turn your key to on but do not start - Get into your vehicle, shut the door, turn key to on position but do not start yet. Wait 60 seconds. Some vehicles have electronic throttle bodies and this 60 seconds will give the vehicle times to re-learn the correct positioning and re-start without any problems.
  17. Start the vehicle - After 60 seconds you can start the car. If the car starts up with no problem and you notice all the lights turn on, you have successfully changed your battery!

Wednesday 14 December 2016

Replace a rusted or dented pickup bumper yourself

Replace a pickup bumper

We put our truck up on a hoist to replace the bumper, which makes things a bit easier. Don't be afraid to do the job with the truck on the garage floor, though it's a good idea to have a floor jack and stands available just in case you can't reach the upper bolts. An air impact wrench speeds things up, but you can do the job by hand with sockets, a ratchet and a breaker bar. You'll also need spray rust penetrant, screwdrivers and eye protection.

We'll walk you through the steps to replace a chrome step bumper on a 2002 Dodge Ram. It's representative of most pickup truck bumpers, but the number of bolts and their location may be different on your truck.


Step 1: First, assess the damage

Before you order any parts, inspect the condition of the bumper step pad, license plate lights, trailer light socket, and any other accessories that might have been damaged by the impact. Next, get your creeper and take a look behind the bumper. Check the condition of the bumper brackets to see if they're bent or rusted. If so, buy new ones—trust us, you don’t want to try to bend them back into shape.


Step 2: Buy new bumpers

Replacement bumpers are available from retail auto parts stores, truck and trailer hitch upgrade shops, local bumper reconditioning shops, and online retailers (rockauto.com and autoanything.com are two examples). Auto recycling yards are also an option, but we found we could buy a brand new factory-quality bumper with new brackets and bolts for just a few bucks more than a used part from the local yards.

Low-price bumpers are usually economy-grade units. They're barebones products (no brackets or bolts) with minimal chrome plating and a short rust-through warranty (if any). An economy bumper for our Ram truck costs about $170 online, including shipping. Those units are perfectly fine for an old truck that you plan to keep only a short time or just want to get into good enough shape to sell or trade.

However, if you need brackets or want a longer-lasting bumper that matches factory quality, buy a premium version that includes those extra parts. That winds up being cheaper than buying an economy bumper and paying à la carte prices for the brackets. A premium unit for our truck cost $445 including shipping and came with new brackets and bolts and two complete license plate light assemblies.


Step 3: Grease the skids with rust penetrant

Removing the rusted fasteners is the hardest part of a bumper replacement job. To make removal easier, pretreat all the fasteners with spray rust penetrant. Shoot a liberal dose on each nut and bolt a few days before you plan to do the swap, then drive the vehicle to create the vibrations that will make the penetrant work faster. Reapply when you get home so the penetrant can soak overnight. Repeat.

Step 4: Remove the accessories first


Reach behind the bumper and hold each nut as you unscrew the trailer light screws. Place the small parts in a magnetic tray or zipper-top bag so you don't lose them.

If your bumper has a built-in trailer light connector, remove the fasteners that hold it to the bumper. Next, disconnect and remove the trailer light connector and harness . Then remove the license plate bulb sockets.


Step 5: Then remove the bumper bolts and brackets


Remove the license plate to reveal the bolts that hold the bumper to the trailer hitch. Use a socket and ratchet to remove them.

Our bumper was attached to the trailer hitch and bed, bumper brackets and frame brackets. Start by removing the license plate and the bolts behind it. Next, reach behind the bumper and remove the bolts that connect the bumper to the truck bed. The frame brackets can be difficult to remove and can make bumper removal more cumbersome. So it's best to remove the bumper first to give yourself more room to access the frame brackets (if necessary). To do that, remove the bolts that connect the left and right bumper brackets to the frame brackets (Photo 4). Then lift off the entire bumper .


Step 6: Install the new bumper

 Snap in the license plate lights


Slide the license plate light into the new bumper. Then align the legs of the U-shaped spring retainer with the slots on the light. Push the retainer onto the light until it snaps into place.

Place the new bumper on cardboard to prevent scratches, then install the new license plate light assemblies . Then install the new bumper . Reinstall the trailer light connector and harness.

How to quickly to remove wheel hub bearing

Thursday 8 December 2016

How to Do a Compression Test?


A compression test reveals the condition of your engine's valves, its valve seats, and piston rings and whether these parts are wearing evenly. Healthy engines should have compression over 100 psi per cylinder, with no more than 10 percent variation between the highest and lowest readings. With a compression tester, a few hand tools, and 20 minutes, you can try this yourself.

STEP 1 Remove the fuel pump and fuel-injection fuses. Disconnect the main wire to the coil and spark plug wires; remove spark plugs.

STEP 2 Start the threaded end of the compression gauge in a spark plug hole by hand.

STEP 3 Turn the ignition on, depress the throttle, and crank the engine four revolutions. This should result in a stable reading; if not, crank up to 10 revolutions, but do the same with all cylinders.

STEP 4 Mark the pressure reading for each cylinder on the valve cover in chalk, then move to the next cylinder.

TIP For a cylinder below 100 psi, pour 1 teaspoon of engine oil into the plug hole and retest. If the reading jumps, the piston rings are worn. If not, think valve problems.