what you'll need:
Time needed: less than an hour, if you don't bleed the brakes.
A set of new brake pads. Always replace both pads at the same time.
14mm socket (upper caliper mountaing bolt)
12mm socket (lower caliper mounting bolt)
10mm socket (pad pin retainer bolt)
small pliers for grabbing the pins
large pliers for squeezing in the pistons
DOT3 or DOT4 brake fluid if you need to adjust the fluid level afterwards
procedure.
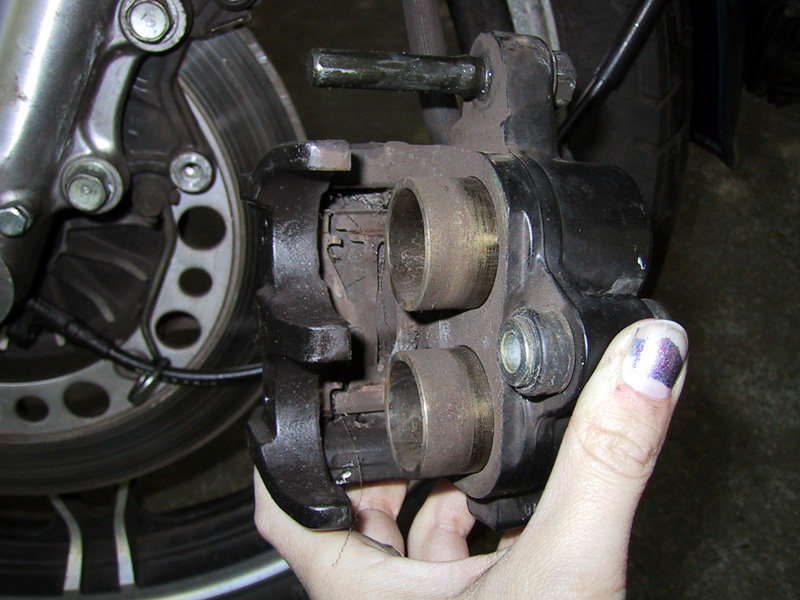
The first thing to do when replacing the front disc brake pads is to remove the brake caliper. There are two bolts that you'll need to unscrew; the upper and lower mounting bolts. They're the two bolts that attach the caliper to the fork. The upper mounting bolt is 14mm, the lower is 12mm. On the Nighthawk, the lower bolt can be physically removed from the caliper; the upper bolt is loosened but doesn't actually come off of the caliper. You just pivot the caliper up on that bolt until it's off the disc, and then pull the caliper off.
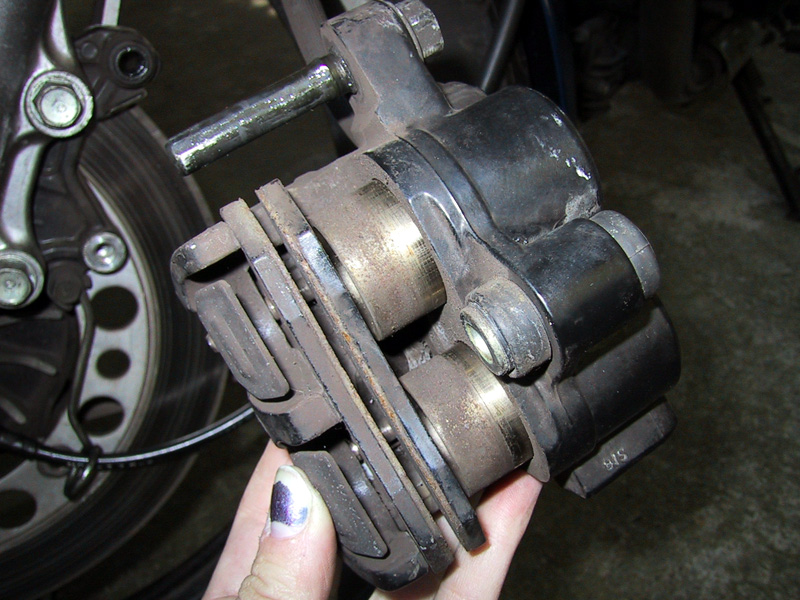
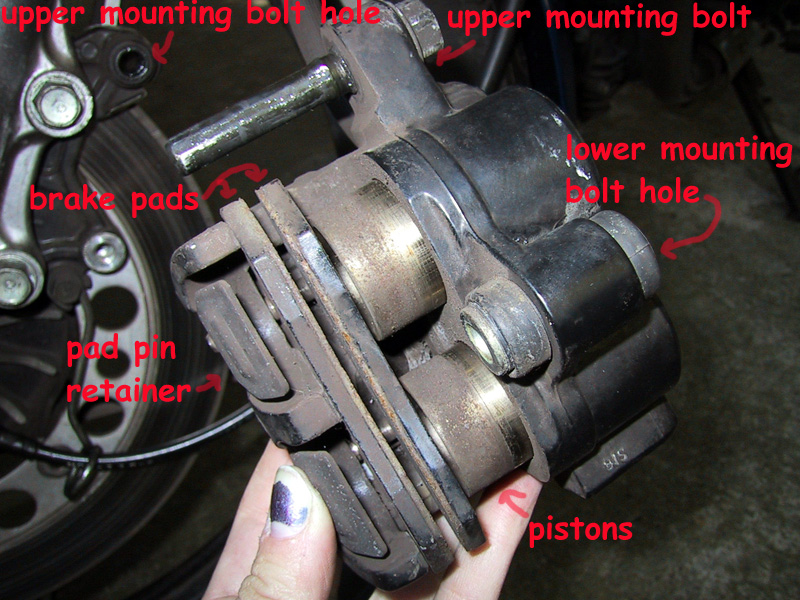
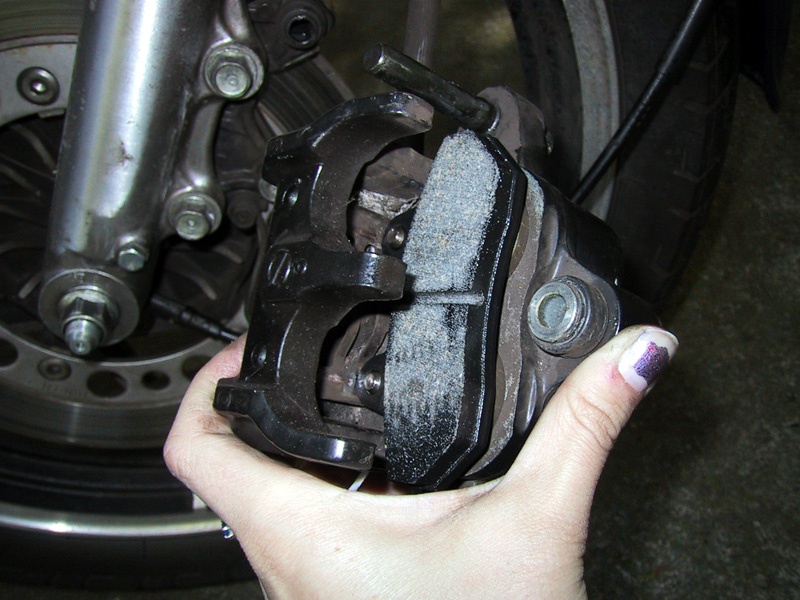
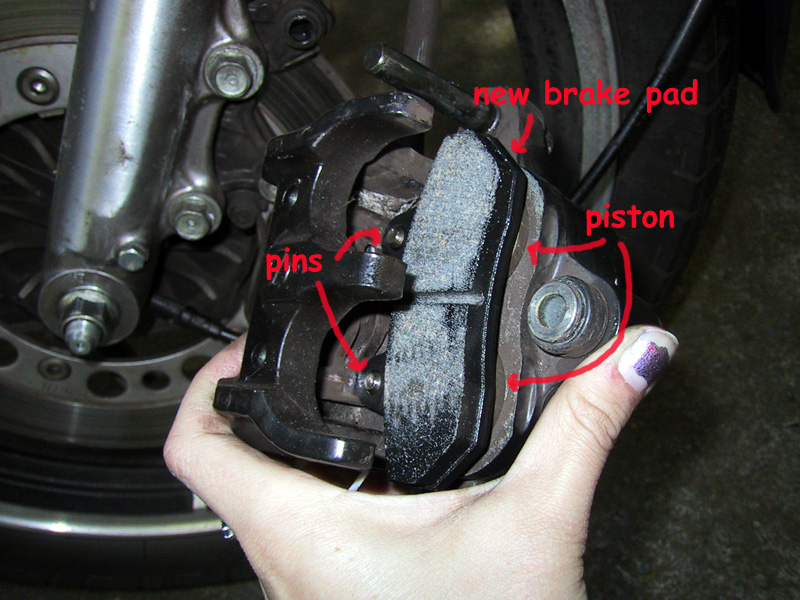
In the picture below, you can see the holes for the mounting bolts in the background to the left of the caliper. The bolt sticking off the caliper is the upper mounting bolt. The picture shows my old brakepads; you can tell there isn't a whole lot left. The picture on the right shows everything labelled.
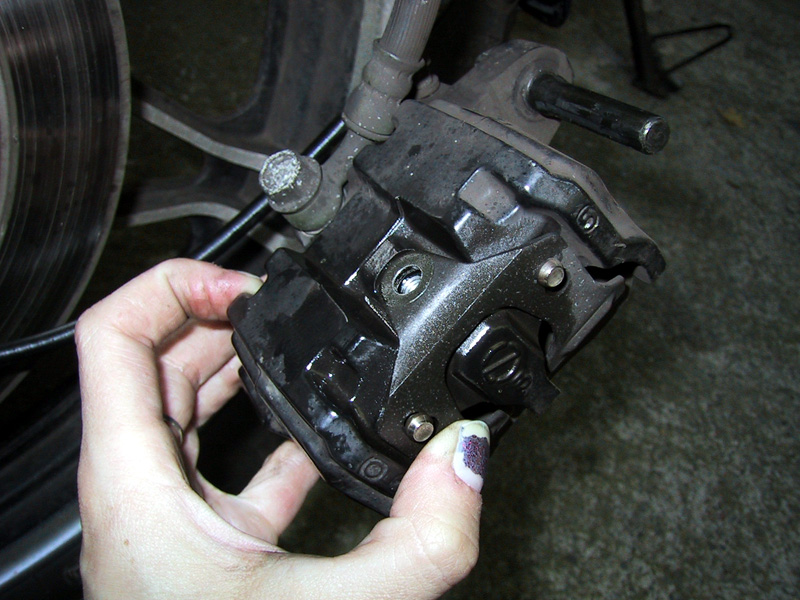
So once you've got the caliper off, the first thing you need to do is remove the pad pin retainer. It's basically a thin sheet of metal that bolts onto the caliper. To be perfectly honest, I have no idea what purpose it serves. Just unscrew the bolt holding it on (10mm), and remove it.
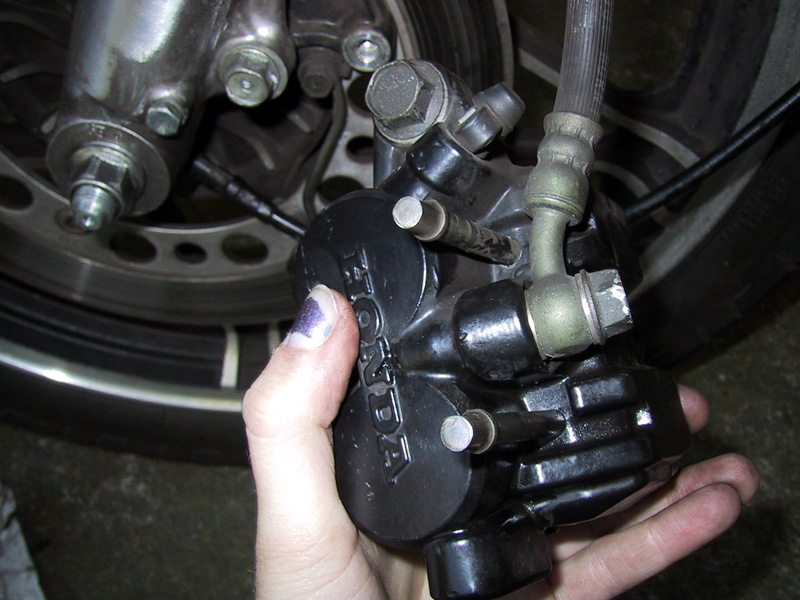
Next, you'll remove the two brake pins. They're the two silver nubs that you can see peeking out through the pad pin retainer. They go all the way through the caliper; just push on them from the side where the retainer was; you can use a small pliers to grab them from the other side and pull them right out. Once you've removed the pins, the old brake pads will just fall out. The next picture shows the caliper without the brake pads.
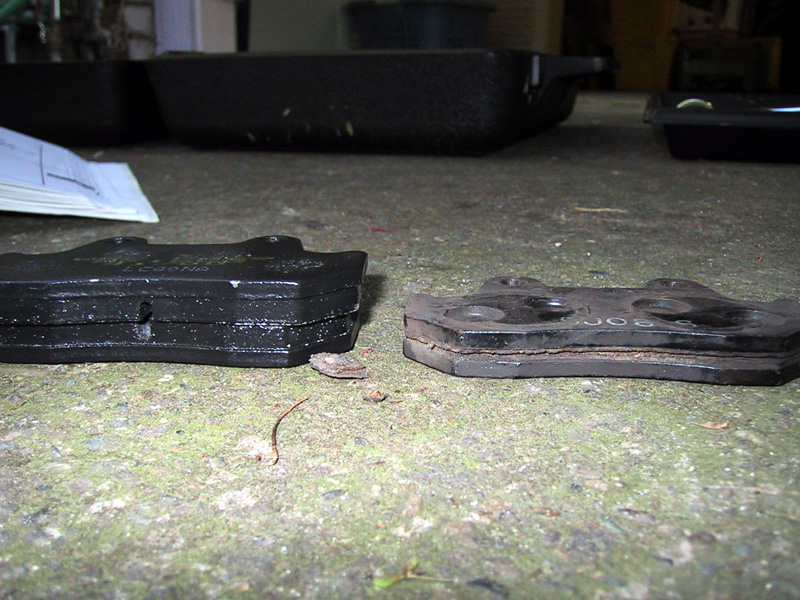
Here's a quick aside to show a comparison between the old brakepads and the new ones. I'll hope it's obvious which is which. :) The new ones have that shiny coating on the sides of the pads; the actual pad surface is Kevlar. These are EBC brand brake pads; I'd heard pretty good things about them.
After the old brake pads are out, you'll want to clean out the caliper a little bit. I had spider webs and dust and yuck all inside the caliper and up inside the pistons (they're hollow). I just used a paper towel, but I suppose you can use a cloth or something if you're really anal retentive. Don't use a wire brush or any kind of solvent, though, which would damage the pistons.
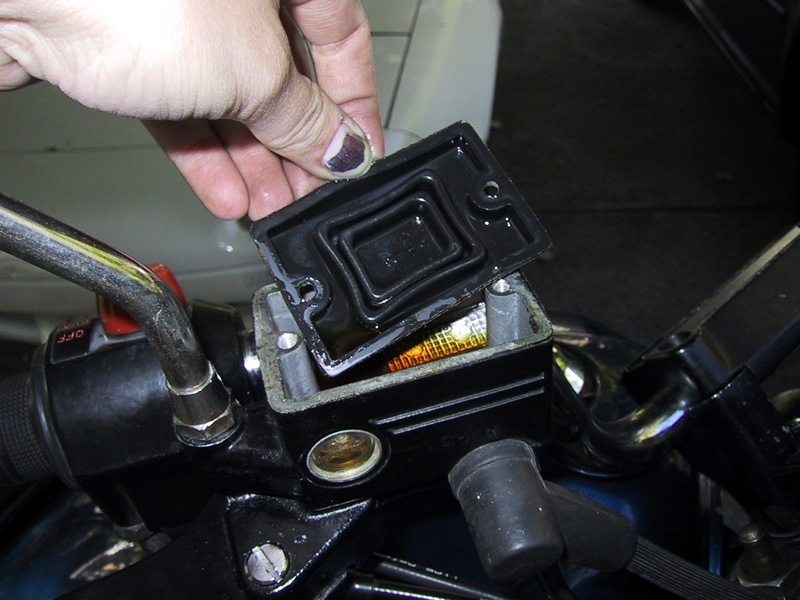
In order to put the new pads in, you'll need to push the pistons back all the way. That'll push brake fluid back up through the cables, so you want to keep an eye on the fluid level up in the resevoir to make sure it doesn't overflow. I took the top off of the master cylider, removed the rubber diaphragm, and covered the gas tank with an old rag (brake fluid is really nasty stuff -- it'll strip your paint right off). Then I just took a large adjustable pliers and slowly squeezed the pistons into the caliper. I did one at a time, but at the very end, squeezing one will cause the other to rise, so you have to do a little back-and-forth game. Remember to squeeze the pistons in slowly, though, because you're wanting to keep an eye on the fluid in the resevoir while you're doing this. If the latter starts to come close to overflowing, drain some out before continuing to squeeze in the pistons. The pistons should squeeze in pretty smoothly; if they don't, you'll need to service the caliper and figure out why the piston's sticking.
Once the pistons are squeezed all the way into the caliper, you can put the new pads in. Most brake pads are interchangeable within the set; double-check this, obviously, but it shouldn't matter which you put in first. So, grab one pad, and put it in the caliper, against the pistons, with the brake pad surface facing out. Grab your brake pins, and insert them into the caliper and through the first brake pad.
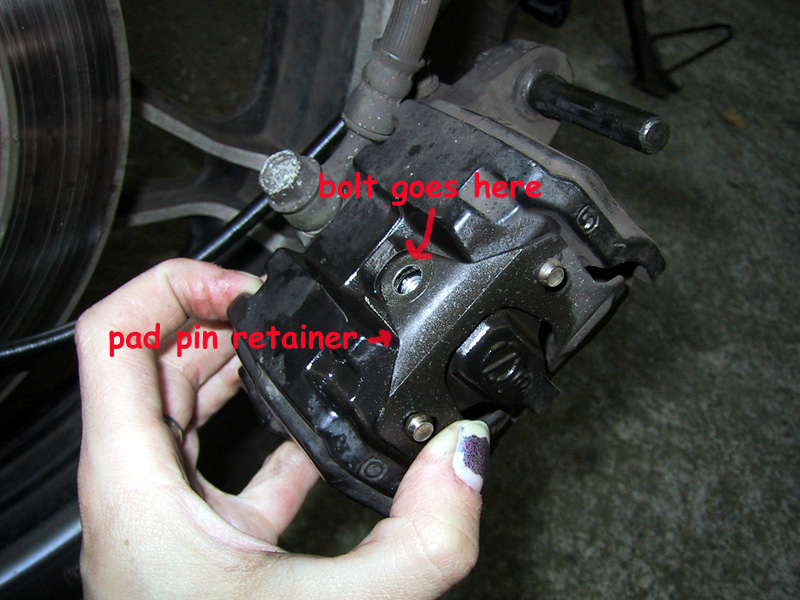
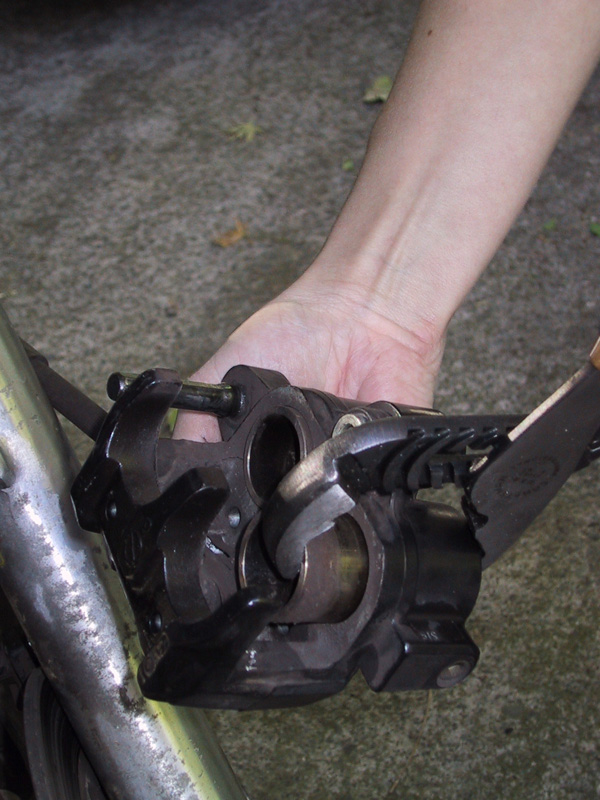
When you install the second brake pad, don't put it flush with the first one. Instead, you'll want to hold it up against the caliper, with as much space between it and the first pad as possible. This is so you can slide the disc in between them. So, hold the second pad against the caliper and slide the pins the rest of the way through it. You'll have to keep holding the pads a little bit to make sure that they stay flush against their respective sides of the caliper. The following picture shows the pins sticking out of the caliper on the opposite side from where the pad pin retainer sits. You'll push them back in from this side. After you slide the pins in all the way, install the pad pin retainer back onto the caliper, and re-insert the bolt. The Clymers suggests torqueing the bolt to 6 foot-pounds, which you can do if you must. :)
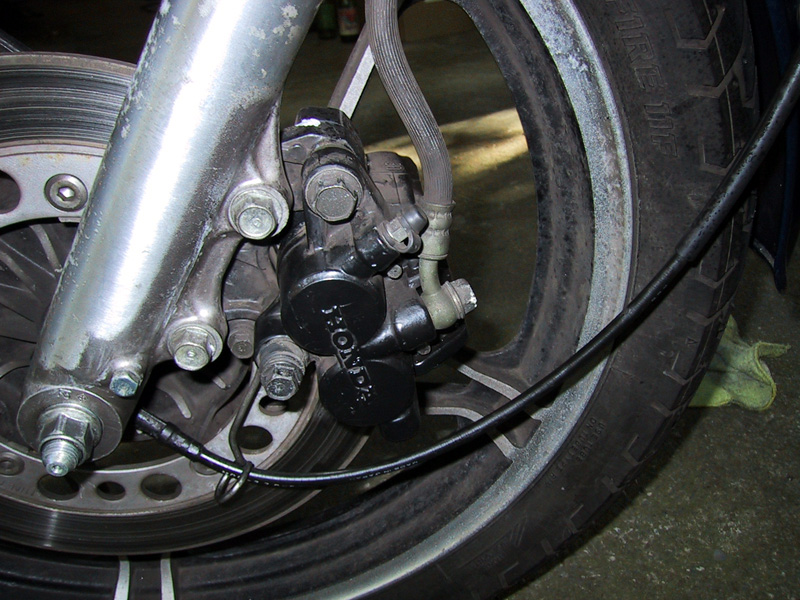
You're almost done! Now you re-insert the upper caliper mounting bolt into the hole on the fork, and slide the caliper down over the disc. Line up the lower mounting hole on the caliper with the one on the fork, and re-insert the lower caliper mounting bolt. The upper bolt should be torqued down to around 16 foot-pounds, and the lower bolt to about 12 foot-pounds.
Double-check the level of fluid in the reservoir, and adjust it if necessary. Don't forget to only use DOT3 or DOT4 brake fluid from a sealed container. If you use brake fluid that's been sitting in an open container, it has most likely absorbed water from the air, and won't compress correctly for your hydraulic braking needs. Once the fluid level is correct (mine didn't need any adjusting at all), replace the rubber diaphragm and screw the top back onto the master cylinder.
Now comes the important part. *Before you do anything else*, squeeze the hand lever for your brakes a bunch of times. Remember how you squeezed the pistons all the way in? You need to get them back out and actually putting pressure on the brake pads. So, go ahead and sit on the bike and just squeeze the brake lever a bunch. You'll notice that the first few times, there won't really be any resistance; keep squeezing until you can feel it working (this'll be obvious, but it's hard to explain. You can tell when a hydraulic system is compressing the fluid and things are moving the way they should be). Try walking the bike a little and squeezing the brakes and make sure that they stop the bike. It's much better to play with it too much now while the bike's off than to be riding and grab for the brake, and have nothing happen.
New brake pads also have a break-in period. They differ from brand to brand, but it's a good rule of thumb to use only light pressure on the brakes for the first 500 miles or so. The surface of the disc rotors is grooved, and you want the surface of the pads to be a little rough, too, so you have friction. If you brake too hard on new pads, you can glaze the surface of the pads, which significantly reduces their effectiveness. There you go! New brake pads. Yay!
No comments:
Post a Comment